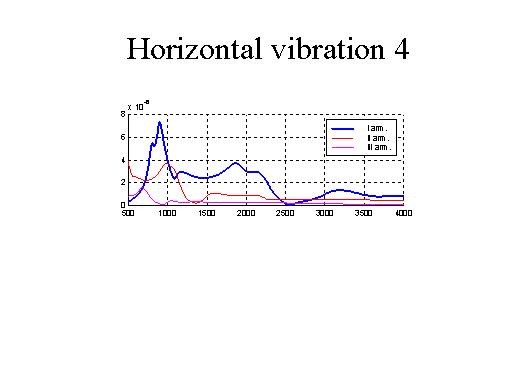
Similar considerations to the behaviour of bearing 3 can be drawn also for bearing 4, shown here.